Table of Contents
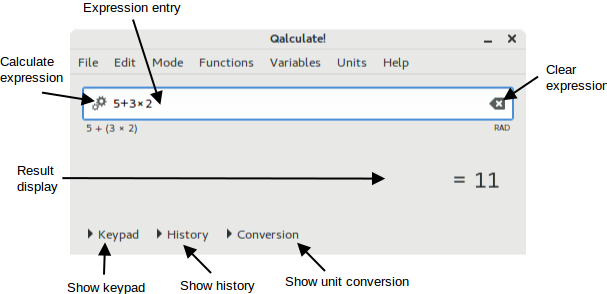
The main window provides a menu bar, the expression entry, the result display and a calculator keypad, history and conversion view which can be shown/hidden by clicking on Keypad, History and Conversion, respectively. When non-default options for the interpretion of expressions have been selected, the choice will be indicated in a small status area below the expression entry, to the right.
The expression entry is the most important part of the Qalculate! user interface. The normal calculation procedure in Qalculate! is to type in a mathematical expression (ex. “5+5”) and press Enter (or click ). The result (“10”) is then displayed below the expression entry in the result display.
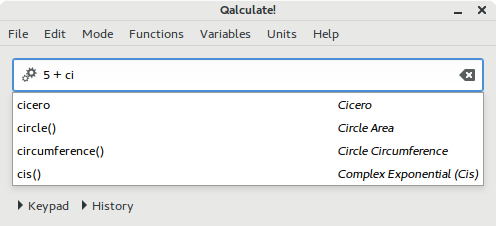
Qalculate! helps out with the expression by giving a list of possible endings to words representing functions, variables and units. The list will narrow with each letter typed. Select an item in the list and the name will be completed. If a function was selected, parenthesis will be added and the position moved for immediate entry of arguments.
As the expression is typed in, the area directly direclty below the expression entry, to the left, will show useful information. By default the calculator's interpretation of the expression is shown (ex. “5 * meter” for “5m”). The interpretation will be displayed in red (configurable) if there are errors in the expression or in blue for lesser errors (for example too many arguments in a function). If the last typed in text represents a function and arguments are about to be entered, the functions name and its arguments will be displayed. The first argument in the information text is highlighted and includes information about its type and restrictions and when an argument has been entered, the next will be highlighted.
After execution of an expression, the whole expression will be marked. This normally means that if something new is entered, the old expression will be overwritten. If, however, an operator (+, −, *, /, ^) is entered first, the old expression will instead be the target of action. The operator will then apply to the whole expression, which is put in parenthesis. This works on all marked ranges, meaning that this way an expression can conveniently be put in parenthesis. Functions set the selection as their first argument.
The Page Up and Page Down keys will access previously entered expressions. With focus in the expression entry, Page Up traverses backwards in the expression history and Page Down forward.
The font used for the expression entry can be selected in the preferences dialog ( → ).
The result of calculations is displayed in the open area below the expression entry. The font used for the result display can be selected in the preferences dialog ( → ). Use of Unicode signs can be turned off in the same dialog. Otherwise Qalculate! will try to make the result as fancy as possible and print π for pi, √ for sqrt, € for euro, and so on. Information about customization of the mathematical result output is available in Chapter 4, Calculator Modes.
In front of the result an equals or approximately equals sign is shown. This indicates whether Qalculate! was able to calculate/display the result exact or only approximate, in the current mode.
The result display has a context menu, which pops up when clicking with the right mouse button anywhere in the field. This menu provides a subset of the display alternatives from the mode menu (Table 2.4, “Mode Menu”) and some actions from the edit menu (Table 2.3, “Edit Menu”). See more info in Chapter 4, Calculator Modes.
If you hold the pointer over the result area a tooltip will show the text representation of the result. To make it more obvious what the result means, abbreviations and implicit multiplication are not used here, and excessive parentheses are shown.
To copy the result, either select → , press Ctrl+Alt+C, or copy the text from the history window.
The keypad provides access to a fairly small set of traditional calculator buttons, which work as expected. The top buttons (from left to right) toggles exact calculation, toggles fractional number display, selects display mode and selects number base in result (see Chapter 4, Calculator Modes).
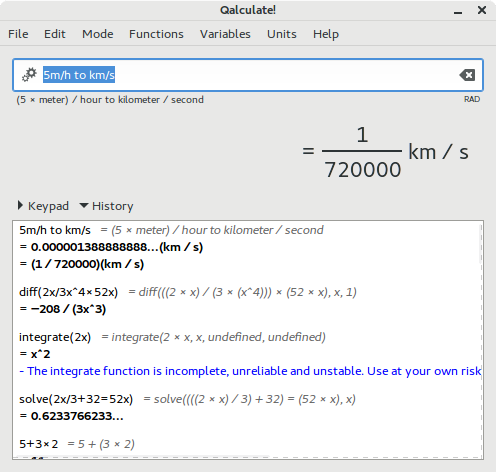
The history view provides access to previous calculation results (50 rows are reloaded on restart). Previous expressions and results, as well as errors and warnings, are displayed in plain text and can be marked and copied (from the right-button context menu or with Ctrl+C) to the expression entry or elsewhere.
The menus in the menu bar provides access to most of the functionality of Qalculate!. Their contents are listed and described below.
Table 2.1. File Menu
Menu Item | Description |
|---|---|
New | Submenu for creation of new objects. See Table 2.2, “New Menu”. |
Import CSV File... | Opens a dialog for import of a data file as a matrix or vectors. |
Export CSV File... | Opens a dialog for export of a matrix or vector to a data file. |
Store Result... (Ctrl+S) | Stores the current result as a variable. See the section called “Variable creation/editing”. |
Save Result Image... | Saves the result display to a PNG image. |
Save Definitions | Saves all user definitions (variables, functions and units). |
Update Exchange Rates | Downloads current exchange rates from the Internet. |
Plot Functions/Data | Opens the plot dialog. See Chapter 8, Plotting. |
Convert Number Bases (Ctrl+B) | Opens the number bases converter. See the section called “Convert Number Bases Dialog” |
Periodic Table | Shows a periodic table, with property values which can be inserted in the expression, in a new window. |
Quit (Ctrl+Q) | Exits Qalculate! |
Table 2.2. New Menu
Menu Item | Description |
|---|---|
Variable | Opens the variable edit dialog for creation of a new variable. |
Matrix | Opens a dialog for entry of a new matrix variable. |
Vector | Opens a dialog for entry of a new vector variable. |
Unknown Variable | Opens the variable edit dialog for creation of a new unknown variable. |
Function | Opens the function edit dialog for creation of a new function. |
Data Set | Opens the data set edit dialog for creation of a new data set. |
Unit | Opens the unit edit dialog for creation of a new unit. |
Table 2.3. Edit Menu
Menu Item | Description |
|---|---|
Manage Variables (Ctrl+M) | Opens the variable manager. See the section called “Variable/Function/Unit Managers”. |
Manage Functions (Ctrl+F) | Opens the function manager. See the section called “Variable/Function/Unit Managers”. |
Manage Units (Ctrl+U) | Opens the unit manager. See the section called “Variable/Function/Unit Managers”. |
Manage Data Sets | Opens the data set manager. |
Factorize | Factorizes the current result. For multivariate rational polynomials, only square free factorization is supported. |
Simplify | Simplifies the current result. Note that easy simplifications are always automatically performed. |
Set Unknowns... | Opens a dialog where the values of unknown variables in the result can be set and the result recalculated. |
Convert To Unit | Submenu with units. Select a unit to convert the current result. |
Set Prefix | Submenu for choice of unit prefix in current result. |
Convert To Unit Expression (Ctrl+T) | Opens the convert to unit dialog for conversion of result to custom unit expression. See the section called “Conversion”. |
Convert To Base Units | Splits up unit(s) in the current result into base units. |
Convert To Optimal Unit | Tries to convert the units in the current result so that as few units as possible is used. Base units are prioritized. |
Insert Matrix | Opens a dialog where you can create a matrix in a spreadsheet-like table and insert into the expression entry. If selected expression text is a matrix, then the matrix is edited. |
Insert Vector | Opens a dialog where you can create a vector in a spreadsheet-like table and insert into the expression entry. If selected expression text is a vector, then the vector is edited. |
Copy Result (Ctrl+Alt+C) | Copies the current result to the clipboard. |
Preferences | Opens the preferences dialog, which controls settings for visual appearance and start/exit actions. |
Table 2.4. Mode Menu
Menu Item | Description |
|---|---|
Number Base | Submenu with a list of number bases (binary, octal, decimal, hexadecimal, sexagesimal, time format, and other bases, and roman numerals) to select for result display, and a menu item (Ctrl+B) for opening a dialog to switch number bases in expression (input) and result (output). |
Numerical Display | Submenu which selects numerical display mode. See Chapter 4, Calculator Modes. |
Fractional Display | Submenu which selects decimal, fractional or combined fractional display. See Chapter 4, Calculator Modes. |
Unit Display | Submenu which controls the display of units and prefixes. See Chapter 4, Calculator Modes. |
Angle Unit | Submenu which sets the default angle unit for trigonometric functions. |
Abbreviate Names | Toggles on/off use of abbreviation for unit, prefix, variable and function names in result display. |
Enabled Objects | Submenu which enables/disables variables, functions, units and unknowns (will not affect defined unknown variables and quoted unknowns), and calculation of variables (If calculation of variables is not on, all variables will be treated as unknown). Here you can also disable complex and infinite results. |
Approximation | Submenu which switches between different approximation modes. |
Assumptions | Submenu which changes default assumptions for unknown variables. |
Algebraic Mode | Submenu with options to automatically simplify or factorize the final result. Note that even if this is set to none, easy simplifications will be performed. In this menu, the option toggle on/off use of the assumption that unknown denominators not are zero is also found. This alternative makes it possible to avoid the situation where expressions such as “(x-1)/(x-1)” can not be further simplified because the denominator might be zero (if x equals 1). |
Read Precision | Enables/disables interpretation of input numbers with decimals as approximate with a precision equal to the number of digits (after preceding zeroes). |
Limit Implicit Multiplication | Activates/deactivates limits to implicit multiplication when parsing and displaying expressions. For details see Chapter 4, Calculator Modes |
RPN Mode (Ctrl+R) | Toggles Reverse Polish Notation mode on/off. For details see the section called “The RPN Mode” |
RPN Syntax | Toggles use of Reverse Polish Notation syntax in expressions on/off. |
Precision | Opens a dialog to change precision in calculations. |
Decimals | Opens a dialog to change displayed number of decimals. |
Meta Modes | Provides a list of available meta modes for loading and menu items to save and delete modes. |
Save Default Mode | Saves the current calculator mode as the startup default. |
Table 2.5. Functions Menu
Menu Item | Description |
|---|---|
(Recent functions list) | Select a function to open the insert function dialog. |
(Function list) | Select a function to open the insert function dialog. |
Table 2.6. Variables Menu
Menu Item | Description |
|---|---|
(Recent variables list) | Select a variable to insert it into the expression entry. |
(Variable list) | Select a variable to insert it into the expression entry. |
Table 2.7. Units Menu
Menu Item | Description |
|---|---|
(Recent units list) | Select a unit to insert it into the expression entry. |
(Unit list) | Select a unit to insert it into the expression entry. |
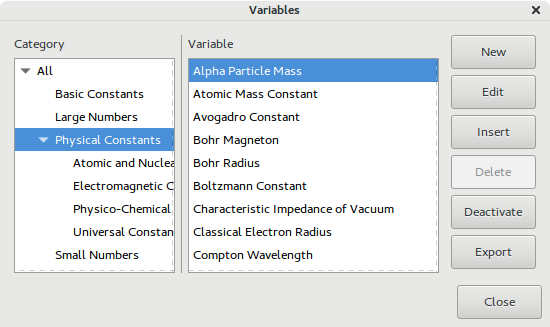
The manager windows provide a structural way of working with variables, functions and units (collectively referred to as objects). The managers for the three different objects are essentially similar. They can be opened from the edit menu and the keypad. Ctrl+M, Ctrl+F and Ctrl+U can also be used for variables, functions and units respectively. The function manager can also be opened with the button in the keypad.
To the left is a category tree and beside that is a list of all objects in the selected category, including all subcategories. Objects without a category are put under “Uncategorized”. The top category, “All”, provides a list of all objects, except those that are deactivated and available in the second top-level category — “Inactive”. The object list does, in addition to descriptive names, for variables have an extra column for values of variables, and units have additional columns for abbreviation/singular/plural and base unit.
The buttons on the right work on the selected object in the list. opens a dialog for creation of a new object, while opens the same dialog to edit the selected unit. inserts the object into the expression entry in the main window, removes the object and toggles recognition in expressions on/off. The unit manager has an additional button for conversion of the current result and the variable manager a button for export to a data file.
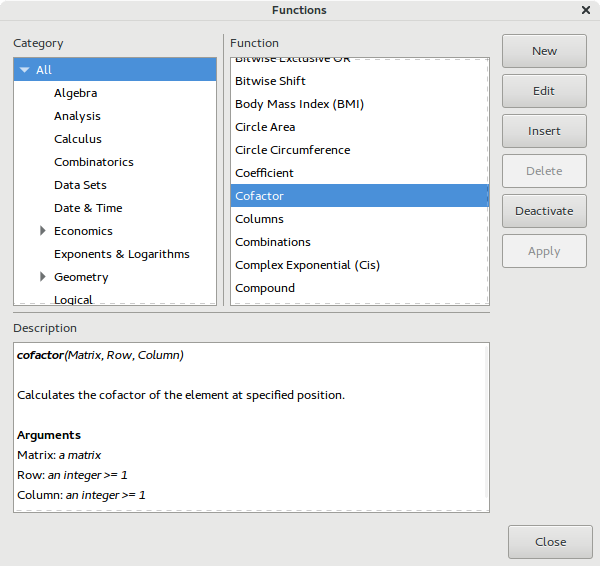
The function manager has a description box at the bottom, which shows the syntax, description and arguments of the selected function.
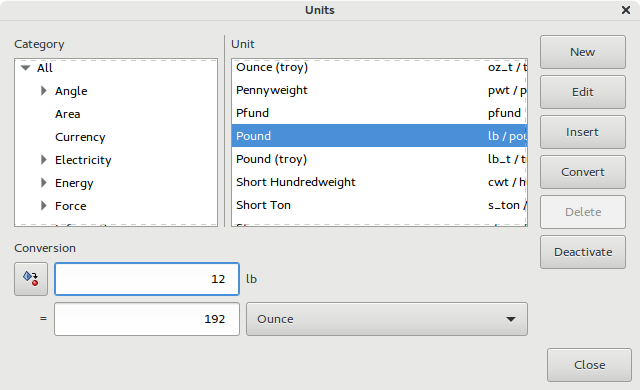
The unit manager has an area for quick conversion between units. This converts between the selected unit in the list and the selected unit in the option menu. The menu contains the same units that are available in the list. Units are converted by specification of a quantity, in the entry next to the unit to convert from, followed by Enter.
For more information about variables, functions and units, see Chapter 5, Variables, Chapter 6, Functions and Chapter 7, Units.
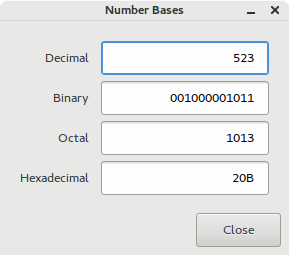
The number bases dialog, accessible from the , is an efficient and convenient tool for conversion between binary, octal, decimal and hexadecimal numbers. This dialog contains entries for each number base. When a number is typed in any of the entries, the others are automatically updated to display the current number in their format. Numbers, or expressions, entered follow the same rules as expressions in the main expression entry.
